If a user can’t access your tenant and forwards the following message to you, here are the steps on how you can solve it.
Your account is blocked
We’ve detected suspicious activity on your account.
Sorry, the organization you are trying to access restricts at-risk users. Please contact your admin.
The unblock is done by either resetting the user password or clearing the user risk once you have assessed that the risk is resolved.
If you have AAD Premium P2 (you can check it on the overview page of Azure AD), remediate the user risk by following this link Identity Protection | Risky users. A password reset is usually suggested and will also clear the user’s risk.
If you do not have AAD Premium P2, you can reset the user’s password or let them do it by themselves by using Self Service Password Reset (SSPR) if you have configured it. Alternatively, you can also go on this page, and ignore the user risk, once you have assessed that everything is resolved: AAD Risky Users. All these methods will clear the user risk.
Allow 10 – 15 minutes before the user can access again without getting the error reported above.
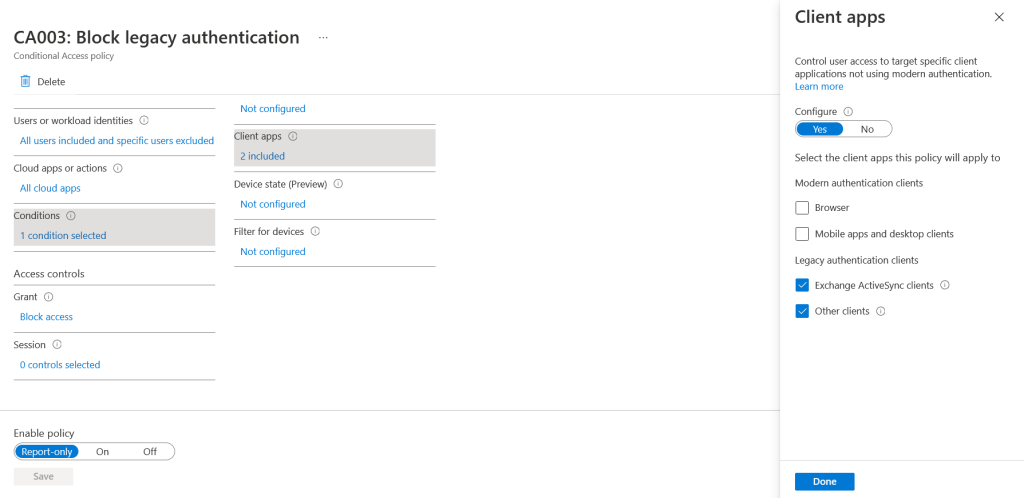
If you have Conditional Access Policies in place to block certain log-ins, you might get that a user will contact you because their sign-in request is being blocked. Probably both you and the user don’t know which policy is making the log-in fail, since it’s not specified in the error message.
The usual error message is something along the lines of: “Your sign-in was successful, but does not meet the criteria to access this resource. For example, you might be signing in from a browser, app or location that is restricted by your admin.” and the standard error code is “BlockedByConditionalAccess” error 53003
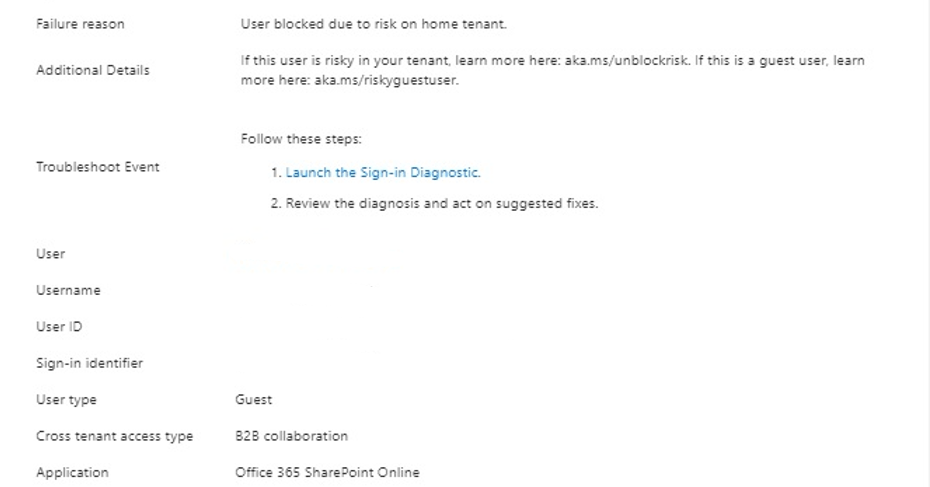
If you just enabled Azure AD Identity Protection for your entire tenant, you might get some complaints from guest users, saying that their sign-in was blocked.
If you got a similar issue, but the user is not a guest but a member of your organization, follow this guide:
You cannot remediate the user risk of a guest. If you try to look for a guest user in Identity Protection | Risky users, you won’t find any.
The user risk is calculated in the “home” tenant, where your user was created, not in the tenant you have guest access / are trying to access. This is also done so that the system may have more insights into user behaviour to calculate the risk.
How to resolve
Now going forward, there are two ways of solving this issue:
If the home tenant administrators have AAD Premium P2, they can remediate the user risk by following this link Identity Protection | Risky users. A password reset is usually suggested and will also clear the user’s risk.
If they do not have AAD Premium P2, they can reset the user’s password or let the user do it by themselves by using Self Service Password Reset (SSPR), if configured. Alternatively, they can also go on this page, and ignore the user risk, once you have assessed that everything is resolved: AAD Risky Users. All these methods will clear the user risk.
Of course, if you wish, you may disable the user risk policy for guests. This is done by creating a dynamic group in Azure AD containing all the guest (Dynamic security group with a dynamic query of usertype equals guest) and excluding it from the policy.
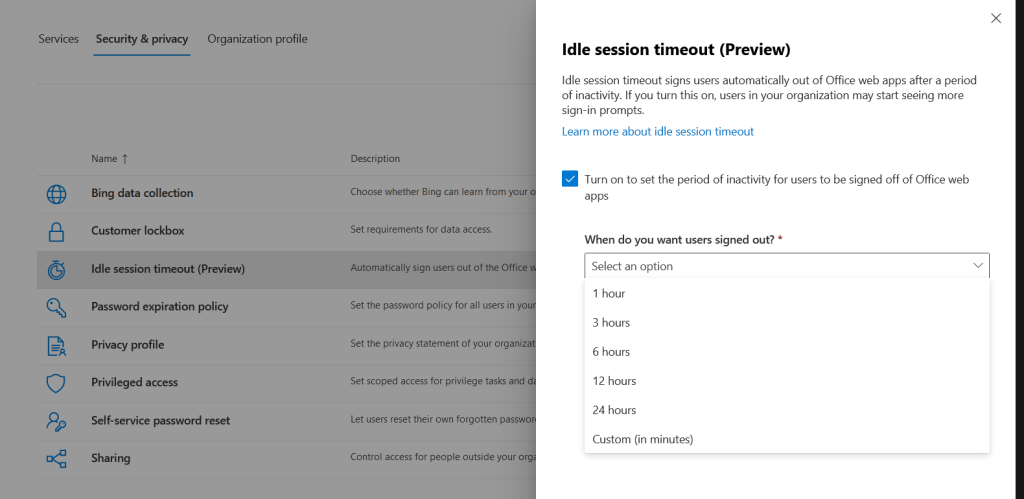
In the last few days, Microsoft implemented a timeout feature for the Microsoft 365 portal and the Office web apps. The aim is to disconnect a user if no activity is received. This will go on to become a global setting: “Idle session timeout for Microsoft 365 web apps will eventually replace current idle timeout settings in Outlook Web App (OWA) and SharePoint Online (SPO)”. This feature is not tab specific, so if you interact with Word (web app), you won’t be signed out from Outlook (web) that you have open in another tab.
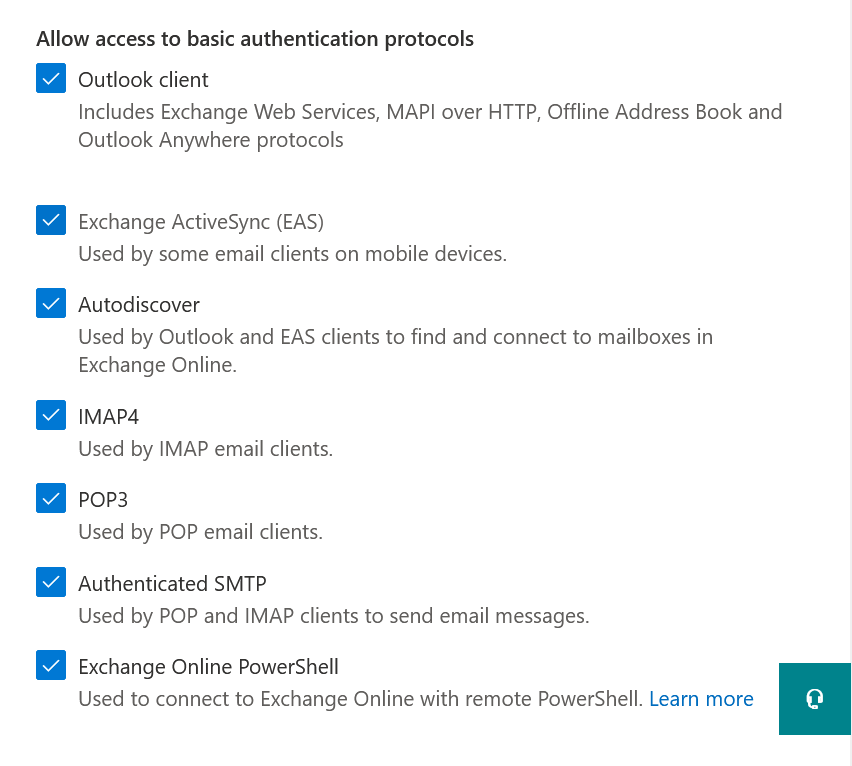
Even if most people use modern authentication for connecting with Exchange Online, some users still have to use app passwords to enable connections from Outlook.
For tenants created after August 2017, modern authentication is enabled by default, but some admins have it turned off.
To enable modern authentication for Exchange Online, follow these steps:
Since the best practice in Azure AD is to configure Break-glass administrators to be excluded from a lot of conditional access policies, you probably want to receive an alert if this user logs into the tenant. This admin should not be used for day to day operations, and the authentication methods should be really strong.
How to guide
For this procedure, you’ll need Azure AD Premium P1 or P2.
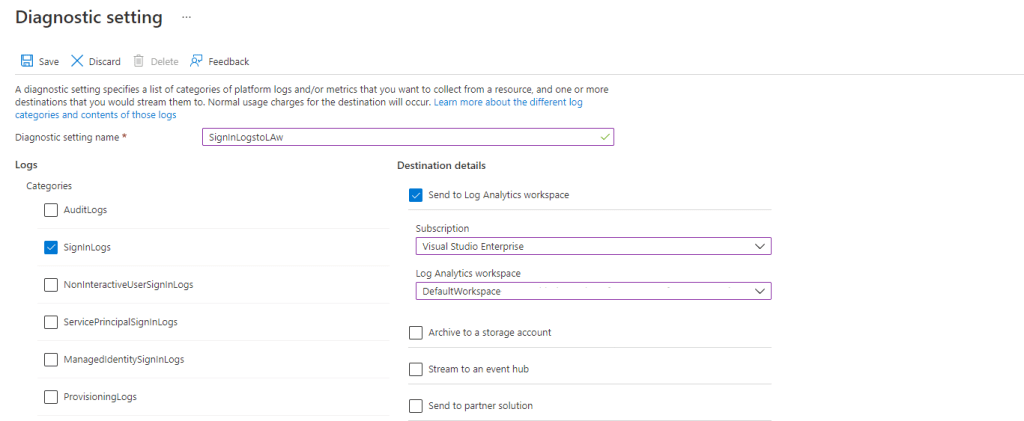
To receive an alert on a user login you’ll need to export sign-in logs to a Log Analytics workspace, then set up the triggers. We’ll go over the steps in this guide:
Click on the user you want to get alerts for, and copy the User Principal Name.
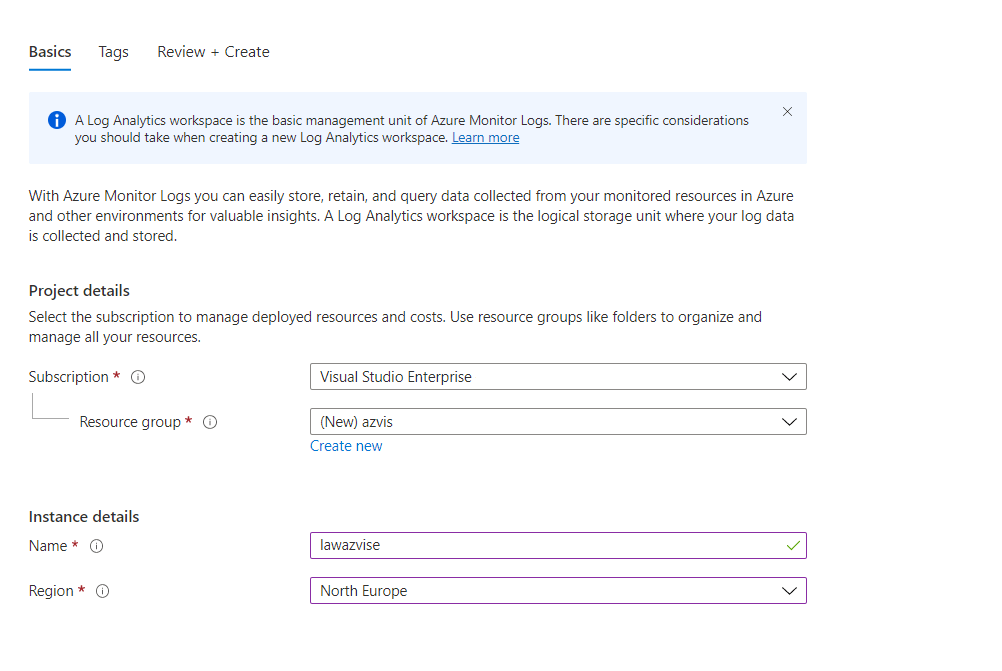
Open your Log Analytics workspace.
Go to “Alerts”, then “+ Create”, “Alert rule”.
Under “Condition“, select “Add”.
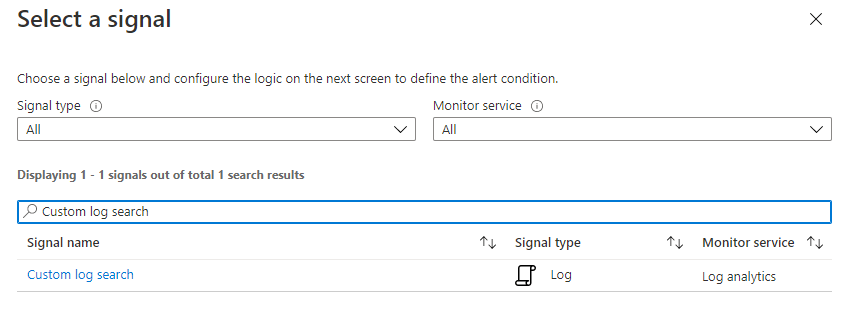
Select “Custom log search”.
In the text box, insert the following code, personalizing it for your UPN:
SigninLogs
| project UserPrincipalName
| where UserPrincipalName == "demo@azdemoenv.onmicrosoft.com"
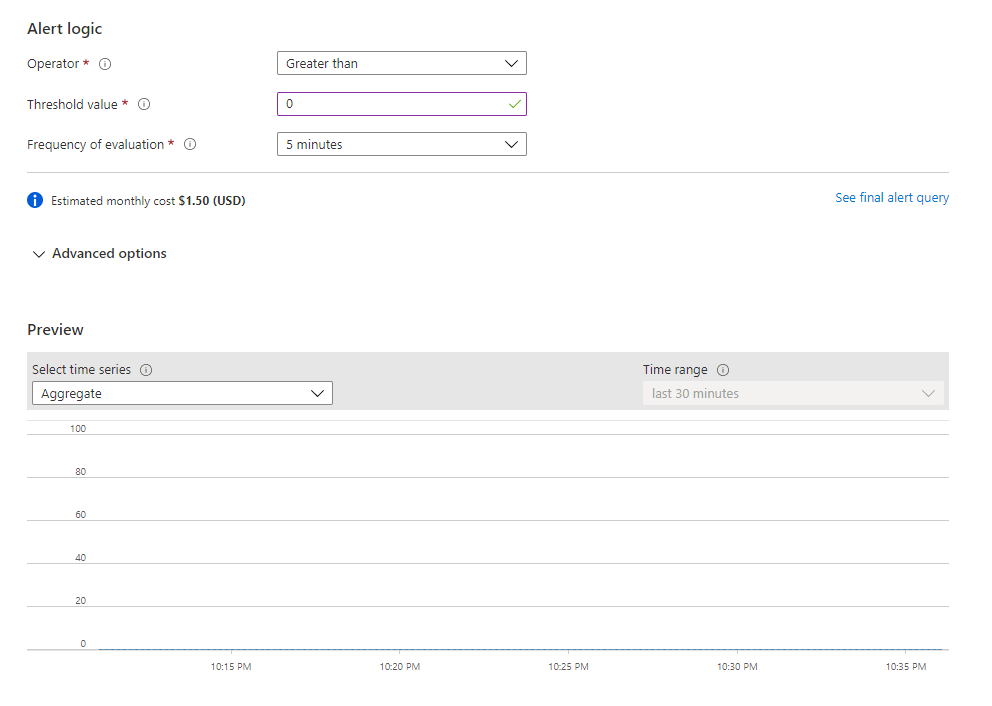
Under “Alert logic”, select “Operator” Greater than 0, with “Frequency of evaluation” 5 minutes.
If you want to get alerts as soon as possible, set the frequency of evaluation to 1 minute.
Click on “Next”.
Create an Action Group, or select your existing one.
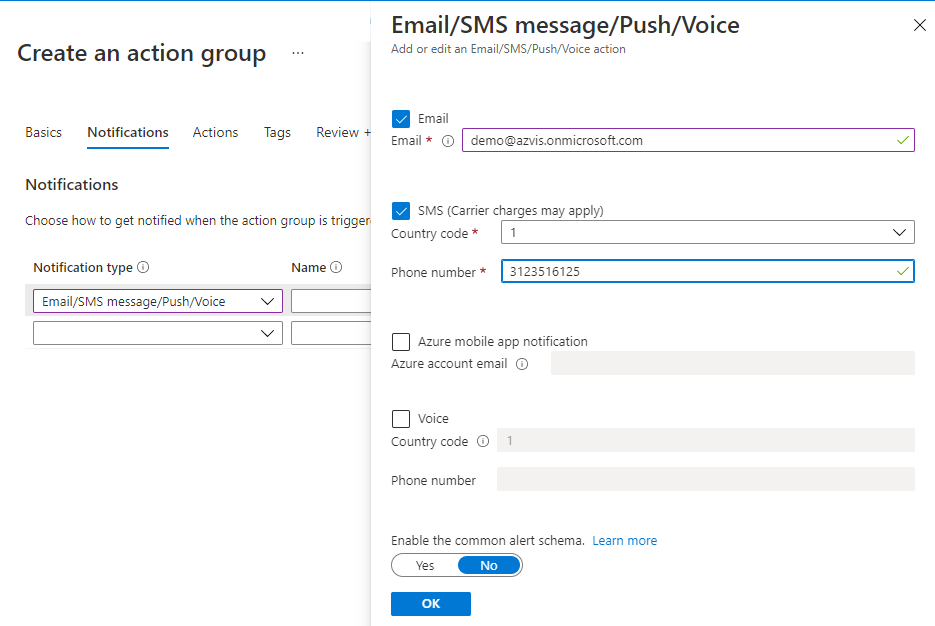
To create one, click on “Add action groups”, select the subscription, resource group, and give the Action Group a name and display name.
Select the type of notification you want to get. In my example, I’ve selected an email and SMS.
Click “Ok”, and give the notification a name.
Click on “Review + create”, you will have the chance to test it out before pushing it in production.
Once you are happy with your rule, click “Create”.
If your tenant is not big, this alert will only cost a couple of bucks. However the bigger cost may come from storing all the sign-in logs. If the logs are under 5 GB, there will not be any charge, if it goes up from there you’ll have to pay for storage fees:
If just enabled a Conditional Access Policy blocking legacy authentication to Exchange Online, enabled Security Defaults, or Microsoft disabled it for your tenant, you might see some Apple Mail clients not connecting anymore.
This issue is happening because the profile might be still configured to use Exchange ActiveSync to connect to Exchange Online, and EAS (along with other legacy protocols) will be retired in October 2022.
Apple supports an automatic switch to modern authentication for its profiles, but only if it was freshly configured after iOS 12.
Unfortunately, it seems that backing up and restoring profiles does not trigger the switch to modern auth, so if you moved to a new iPhone and didn’t reconfigure the profile manually, you’ll need to remove and recreate it.
UPDATE 16.06.2022:
Apple will add support for the automatic migration to modern auth in iOS 15.6. Once you update your Apple device, the Mail app will use the saved credentials to establish a new authentication flow. From that moment onward, you’ll authenticate to Azure AD (Microsoft online Identity Provider) and get a new OAuth access token. The “old” stored credentials will then be removed. The process is fully transparent to users.
If you just installed the Azure Information Protection on-premises scanner and you are trying to start your first Content Scan Job, you might get that the button “Scan now” is greyed out.
Before attempting to troubleshoot, check that you selected the job below. If you did, try restarting the service “Azure Information Protection Scanner” on the SQL server and refreshing the Azure Content scan job page.
If you still cannot start the scan, try executing the following command on the SQL server, and insert the credentials of the service account:
It’s been a long time since Microsoft released number matching and additional context for the Microsoft Authenticator. These features allow you to quickly improve your MFA posture, adding a new layer of security and preventing accidental approvals. This is also useful to lower the chances of being compromised by MFA fatigue attacks. The feature consists in a map shown on your MFA prompt on your phone that indicates where the MFA request is coming from, the name of the application requesting the MFA challenge, and a box to insert the number that will be shown on screen.
Image taken from the Microsoft Docs. Link in the notes
How to enable it
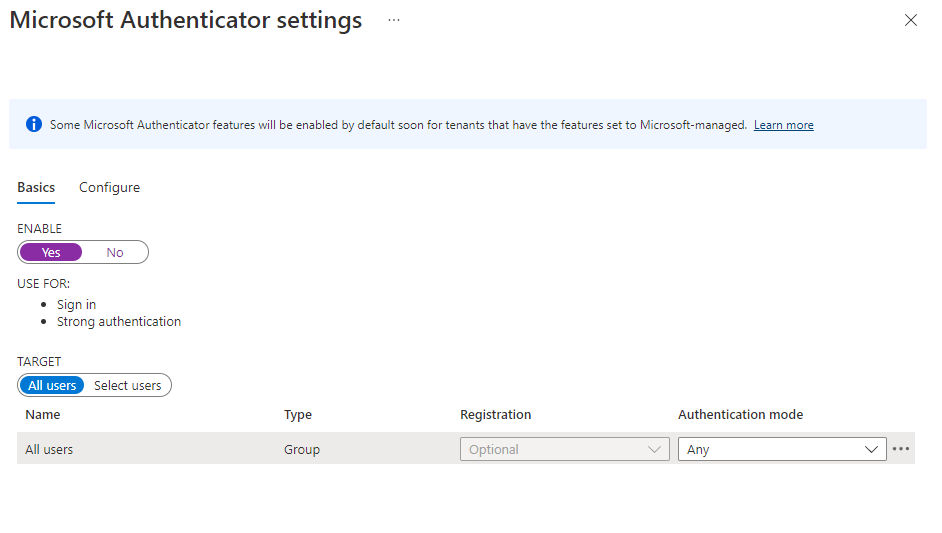
To enable these features follow this link, which will guide you into Azure AD > Security > Authentication methods:
Be sure to activate “Require number matching for push notifications“, “Show application name in push and passwordless notifications” and “Show geographic location in push and passwordless notifications“, then save.
You can scope the features to a selected group of users if you want to test them out and go for a gradual rollout. This is done by selecting “Select group” and adding the group for which you want to enable the feature.
Additional notes
Check out this article if you are looking for a communication to send out to users before rolling out the features:
There are a couple of ways to enable an automatic classification of files in SharePoint. The first one, more complete from a customization point of view, is to use a File Policy in Defender for Cloud Apps. The second one (the newer and less recommended one, to be fully released Q3/Q4 2022) is to use a Default Sensitivity Label in SharePoint Online.
If you are looking at how to enable file monitoring and file policies, follow this guide:
Create a broad filter. I’ve set it as “App equals SharePoint Online” for this example.
Under “Apply to”, specify the root folder where the policy should start to apply.
Apply the governance action “Apply sensitivity label”, and select your label. Check the box below if you wish MDCA to override all user-defined labels. This will override older labels set on docs in the site and new ones defined at document creation.
Save the policy
Suppose you would like a policy to automatically apply labels to all the files and subfolders recursively from a root folder onward in SharePoint or OneDrive. In that case, you might think you can use the “Files matching all of the following” filter. Unfortunately, this won’t work, as it will not match recursively on the files contained in the subfolders.
Default Sensitivity labels in Sharepoint Online
Once you enable SharePoint to process labels, you can configure a default label for document libraries. This will ensure that any new or newly modified files get the specified label.
The feature will not apply to documents not opened since setting the default label or if the file has a higher priority label applied. Therefore, I would recommend, for the moment, using PowerShell or MDCA (as shown above) before setting the default label.
The feature will also not work if you have “User access to content expires” set anything other than Never or if you use Double Key Encryption.
I’ve recently created a quick script to enable this feature. Check it out here:
Using Azure AD Access Reviews (available with Azure AD Premium P2), you can automatically remove guest users from your tenant who haven’t had access in a specified number of days. In this guide, we will implement the access review step by step.
This is a great way to clean up your tenant automatically and can be scheduled.
NOTE: The procedure used to clean up only users who didn’t have access in the last 30 days. This has now been expanded to support a variable number of days (ex. 60, 90, etc).
Step by step guide
As a prerequisite, you’ll need to create a dynamic group in AAD, which will contain all guest users who can log in to the tenant:
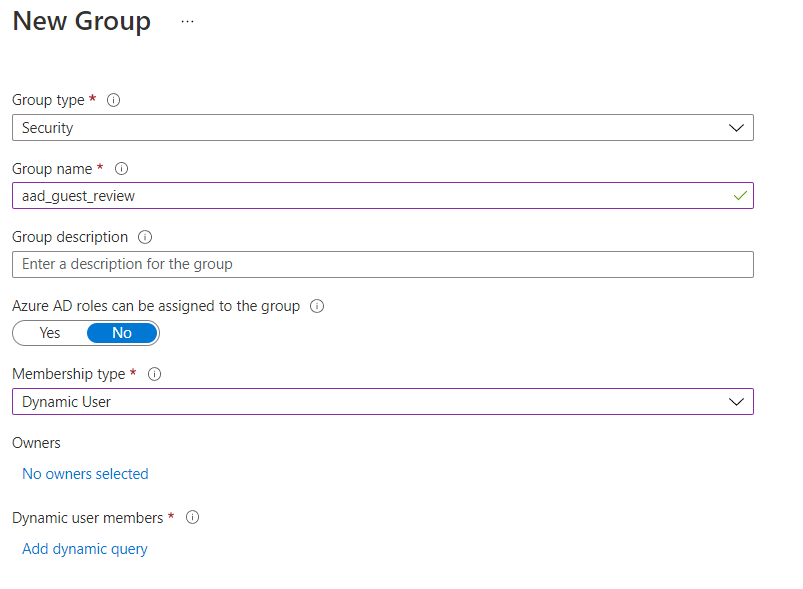
To create the group, go to AAD Groups, then click on “New Group”.
Select Group Type as “Security“, give the group a name, and select “Membership type” as “Dynamic User“.
Under “Dynamic user members”, click on “Add dynamic query“.
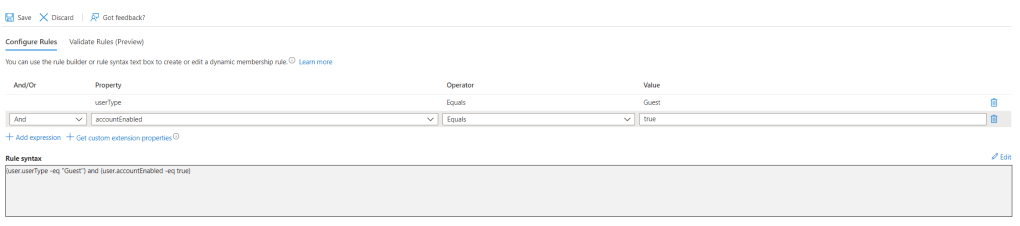
The query you will want to create is:
(user.userType -eq "Guest") and (user.accountEnabled -eq true)
You can create this group also using Powershell, and pasting this command after installing the Graph module.
The accountEnabled attribute lets you filter for users who can log in. Since the access review will deactivate the account for 30 days before deleting it permanently, this way we’ll filter only for the guest users active in the tenant and not the ones ready to be automatically deleted.
Once done, click on “Create”.
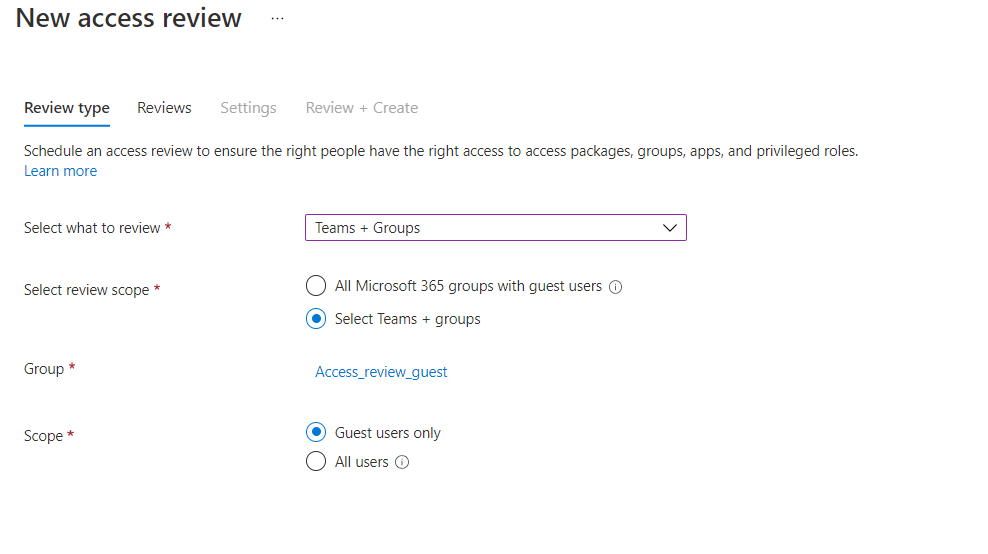
To create the access review, open this link, then follow the steps listed below:
Select “Teams + Groups” under “Select what to review”, “Select Teams + groups” under “Select review scope”, under “Group” enter your group, then click on “Guest users only” under “Scope”.
You can then filter only for the guest that did not had access in a specified number of days. This is accomplished using this part of the wizard:
Click on Next, and under “Select reviewers”, click on “Selected user(s) or group(s)“. The person or people that will manually review the users to delete should be selected just below. If not needed, insert an admin and go ahead. I always give at least 3 to 5 days for the reviewers to check if somebody should not be blocked or deleted. If some guest user should always be excluded from the review, you can add an exclusion in the AAD Group membership rules.
In the last paragraph, you’ll want to select auto-apply results to make the automation work. Under “If reviewers don’t respond”, choose “Take recommendations“. The recommendations will be based on whether the user has logged in recently or not. There are no other recommendations that I am aware of at this moment. Under “Action to apply on denied guest users”, select “Block user from signing-in for 30 days, then remove user from the tenant“. Be sure that “No sign-in within 30 days” is selected as reviewer decision helper, as per the image below.
If you want this to be fully automated, deselect “Justification required”.
Once done, click on “Review + create”, give the review a name and click on “Create”.
Now you will automatically have the guest users who haven’t logged in in the specified number of days blocked. After 30 days, the blocked user will be removed from the tenant.
Additional resources
Jef Kazimer wrote a really cool guide on how to remove unredeemed B2B guest from your Azure Active Directory:
Unified Audit Log is one of the essential features for tracking down every action done across the tenant.
The logs are kept for 90 days by default, but you can extend them using special addons.
If you want to check whether the logging is enabled on your tenant, connect to Exchange Online with PowerShell. Once connected, you can check the status.
You might be asked to run “Enable-OrganizationCustomization” before relaunching the command. You must wait 30 to 60 minutes after sending “Set-AdminAuditLogConfig -UnifiedAuditLogIngestionEnabled $true” to see it enabled in the portal.
Portal way:
Go to https://compliance.microsoft.com/, then click on “Audit” on the left pane. When you get to the page, click on “Start recording user and admin activity“, then check the status after 30-60 minutes. If it fails, try with PowerShell.
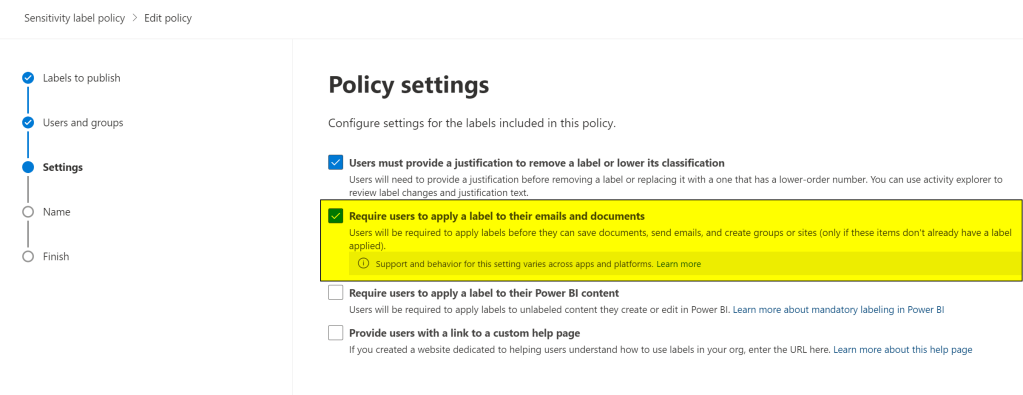
When you select “Require users to apply a label to their email and documents” inside a label policy in Microsoft Information Protection, users will be required to classify the documents they create/modify.
To add this requirement, access the compliance portal and select a label policy you created.
Then click “Edit policy” and go straight into “Settings”. Select “Require users to apply a label to their emails and documents”, then save the label policy.
Just follow the steps listed before and unselect “Require users to apply a label to their emails and documents” from all the label policies to remove the requirement.
Be aware that the policy may take a while to replicate.
Project Freta is a newly announced offer from Microsoft, which aims at discovering any malware or rootkit running on Linux systems, by conducting memory forensic analysis automatically. The analysis is conducted at no cost and is very easy to extrapolate the data, democratizing the forensic process.
Project Freta was designed and built with survivor bias at its core. It is a security project designed from first principles to drive the cost of sensor evasion as high as possible and in many cases render evasion technically infeasible.
At the moment there are more than 4,000 supported kernel versions.
The process is very useful because the malware cannot “hide” himself, since the image processing system is non-intrusive to the VM, giving analysts a complete view on what’s running and potentially bad for the server.
The supported memory images formats are the following:
vmrs
lime
core
raw
The memory can be captured using various tools, such as:
vmss2core (VMware)
Hyper-V Manager
AVML
The tool works by analyzing an image uploaded on the cloud. Once the image has been acquired, you can let the program scan it.
To scan the servers / PCs using the MAP Toolkit, you will need an AD user with administrative privileges on all the components to scan.
This will be enough if you need a report of what’s installed on a series of servers/clients, their roles, and all “local” related queries, or basic AD queries.
For Exchange related queries, you will need an Exchange Admin or Domain Admin. Please refer to the following TechNet page for the full requirements:
Requirements: i. Log Analytics workspace ii. Azure Automation Account
From the Log Analytics Workspace, click Connect a data source Save the Workspace ID and Workspace key Install the agent on the server, providing the Workspace ID and Key found in the workspace
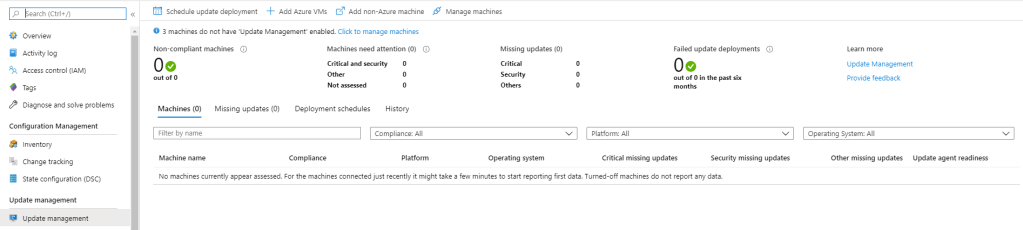
Go into the automation account, then from the left into update management Enable update management on the VM by clicking on “Click to manage machines”
You can then see the missing updates and create an update deployment
Please allow up to 24hrs for all the servers to show up (it usually takes about an hour)