Secure Teams, a step by step hardening guide

This is a brief and introductory guide on what you may want to configure and change in a basic hardened Teams environment. Please consider that these are just general recommendations, and what works for a company may not be the best for another one. This is especially true when it comes to setting up collaboration services. Keep in mind that your Teams security is only as good as your identity security

It’s helpful to note that some companies require that users should not be able to create new teams, depending on your internal policies. This is done by limiting the creation of Microsoft 365 groups using the following setting: Groups – Microsoft Azure – Users can create Microsoft 365 groups in Azure portals, API or PowerShell. The same is also available via PowerShell in a more complete way. 

Before diving into the settings, you may consider the following, that will not be discussed further, but are non the less important:

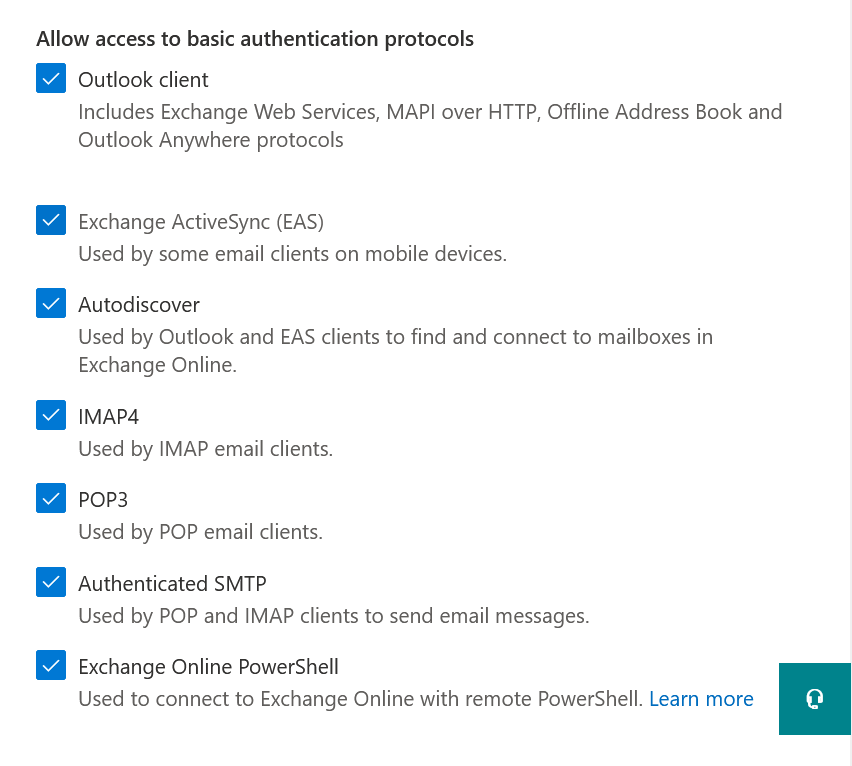
  • You should already have a basic hardened Azure AD environment (or AD + AAD if you are in an hybrid scenario). Your Teams security will be only as good as your identity security. For example, if you don’t have MFA set up yet or you are not blocking legacy authentication protocols, you might be better off starting from there.
  • You should consider setting up retention and expiration policies for Teams, especially if you will let users create teams freely.
  • DLP and sensitivity labels should be created and applied.
  • You should monitor user activity often via the Teams portal.
  • Enhanced encryption policies should be evaluated on a company by company basis since it disables recording and transcription.
  • You should start using and configuring Cloud App Security
  • Live event policies should be evaluated based on whether your company uses them.
  • Voice settings should be evaluated on a customer by customer basis, depending on what you have to implement and your general infrastructure.

Follow along by opening the Teams Admin center and evaluating these settings.

Teams -> Teams settings:

  • Turn OFF all external file sharing and cloud file storage options in the Files tab if they are not company approved.
  • “Users can send emails to a channel email address” should be set to OFF, or only specified domains should be allowed
  • “Scope directory search using an Exchange address book policy” controls how users find and communicate with other people in their organization. This may help users out, but it’s not a “must set”.

Teams -> Teams Policies:

  • Consider creating new policies for more granular management. The settings could be left all on if no specific stricter need arises.

Teams -> Teams Update policies:

  • You may want to consider setting “Show Office Preview” as not enabled. This is, however, not critical.

Teams -> Teams Upgrade settings:

  • Coexistence mode should be set to Teams Only if you are not using Skype for Business.

Users -> Guest access:

  • “Make private calls” should be set to OFF since there is mostly no need for a guest to make calls “using” your tenant.
  • “Meet Now” should be set to OFF.
  • “Edit sent messages” should be set to OFF.
  • “Delete sent messages” should be set to OFF.
  • “Delete chat” should be set to OFF.

Users -> External access:

  • Here, you can either allow all external domains, allow only specific domains or only block specific ones. This setting is very dependent on your organization and your risk acceptance level. Most SMBs are blocking specific domains.
  • Allow users in my organization to communicate with Skype users should mostly be set to OFF. The same goes for “People in my organization can communicate with Teams users whose accounts aren’t managed by an organization”.

Teams apps -> Permission policies:

  • You either go for a restrictive global policy or create tailored policies later. Whatever is best for your use case.
  • Third-party apps should be set to Block all apps if you are not using any.
  • Custom apps should be set to Block all apps if you are not using any.

Meetings -> Meeting policies:

  • You either go for a restrictive global policy or create tailored policies later. Whatever is best for your use case.
  • “Let anonymous people join a meeting” should be set to OFF.
  • “Let anonymous people start a meeting” might be set to OFF.
  • “Who can present in meetings” should be set to “Organizers, but users can override”.
  • “Automatically admit people” should be set to “Invited users only”.
  • “Dial-in users can bypass the lobby” should be set to OFF.

Meetings ->Meeting settings:

  • Anonymous people can join a meeting should be set to OFF
  • Anonymous users can interact with apps in meetings should be set to OFF
  • “Insert Quality of Service (QoS) markers for real-time media traffic” is usually set to ON. Not a deal-breaker, but it’s sometimes helpful to get insights.

Meetings -> Messaging policies

  • Owners can delete sent messages should be set to OFF if you don’t need moderation in Teams.
  • Delete sent messages may be set to OFF, if the need arises.
  • Delete chat should mostly be set to OFF.
  • Edit sent messages may be set to OFF, if the need arises.
  • Read may be set to “Turned on for everyone”, but it’s not a priority.
  • Giphy content rating should be set to “Moderate”.

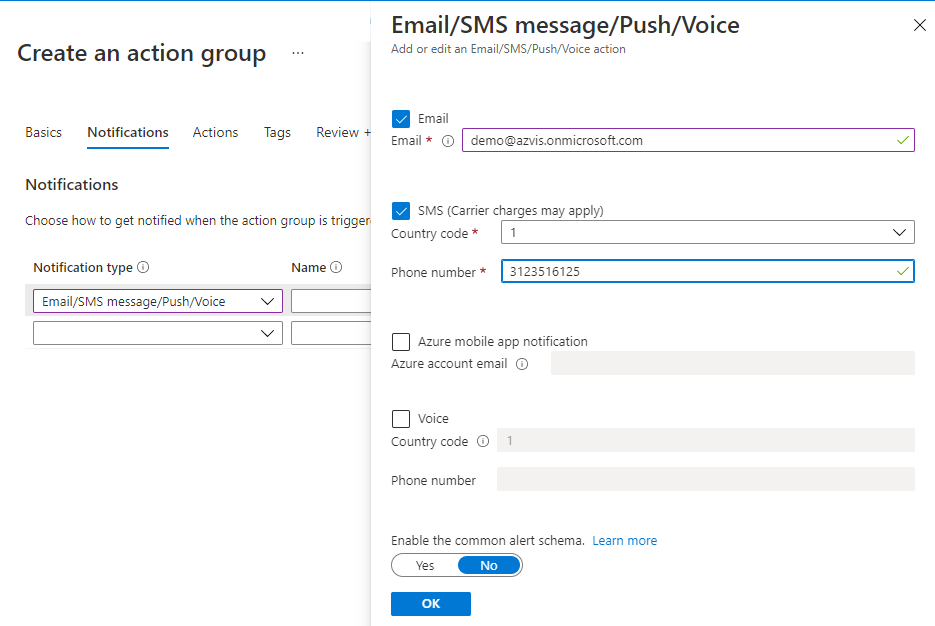
You should set rules under “Notifications & alerts”, as they are more free insights that you get.

If you use Skype for Business, you may want to configure the policies found under Other settings -> Skype for Business.

Unblock at-risk user – Azure AD

If a user can’t access your tenant and forwards the following message to you, here are the steps on how you can solve it.

Your account is blocked

We’ve detected suspicious activity on your account.

Sorry, the organization you are trying to access restricts at-risk users. Please contact your admin.

The unblock is done by either resetting the user password or clearing the user risk once you have assessed that the risk is resolved.

  • If you have AAD Premium P2 (you can check it on the overview page of Azure AD), remediate the user risk by following this link Identity Protection | Risky users. A password reset is usually suggested and will also clear the user’s risk.
  • If you do not have AAD Premium P2, you can reset the user’s password or let them do it by themselves by using Self Service Password Reset (SSPR) if you have configured it. Alternatively, you can also go on this page, and ignore the user risk, once you have assessed that everything is resolved: AAD Risky Users. All these methods will clear the user risk.

Allow 10 – 15 minutes before the user can access again without getting the error reported above.

How to check which Conditional Access Policy is blocking a user log-in – Azure AD

General Introduction

If you have Conditional Access Policies in place to block certain log-ins, you might get that a user will contact you because their sign-in request is being blocked. Probably both you and the user don’t know which policy is making the log-in fail, since it’s not specified in the error message.

The usual error message is something along the lines of: “Your sign-in was successful, but does not meet the criteria to access this resource. For example, you might be signing in from a browser, app or location that is restricted by your admin.” and the standard error code is “BlockedByConditionalAccess” error 53003

How to solve

To get more details:

  • Click on the failed log-in request
  • Click on “Conditional Access
  • The Policies that have as a result “Failure” and “Grant Controls” set on “Block” are the ones blocking the user.

User blocked due to risk on home tenant – Azure AD

General Introduction

If you just enabled Azure AD Identity Protection for your entire tenant, you might get some complaints from guest users, saying that their sign-in was blocked.

If you got a similar issue, but the user is not a guest but a member of your organization, follow this guide:

https://azvise.com/2022/05/25/unblock-at-risk-user-azure-ad/


You cannot remediate the user risk of a guest. If you try to look for a guest user in Identity Protection | Risky users, you won’t find any.

The user risk is calculated in the “home” tenant, where your user was created, not in the tenant you have guest access / are trying to access. This is also done so that the system may have more insights into user behaviour to calculate the risk.

How to resolve

Now going forward, there are two ways of solving this issue:

  • If the home tenant administrators have AAD Premium P2, they can remediate the user risk by following this link Identity Protection | Risky users. A password reset is usually suggested and will also clear the user’s risk.
  • If they do not have AAD Premium P2, they can reset the user’s password or let the user do it by themselves by using Self Service Password Reset (SSPR), if configured. Alternatively, they can also go on this page, and ignore the user risk, once you have assessed that everything is resolved: AAD Risky Users. All these methods will clear the user risk.

Of course, if you wish, you may disable the user risk policy for guests. This is done by creating a dynamic group in Azure AD containing all the guest (Dynamic security group with a dynamic query of usertype equals guest) and excluding it from the policy.

Enable idle session timeout for Microsoft 365

In the last few days, Microsoft implemented a timeout feature for the Microsoft 365 portal and the Office web apps. The aim is to disconnect a user if no activity is received. This will go on to become a global setting: “Idle session timeout for Microsoft 365 web apps will eventually replace current idle timeout settings in Outlook Web App (OWA) and SharePoint Online (SPO)”. This feature is not tab specific, so if you interact with Word (web app), you won’t be signed out from Outlook (web) that you have open in another tab.

You can check out the roadmap here:

Office App: Idle session timeout for Microsoft 365 web apps

I’ve noticed some inconsistencies in the practical application, which will be probably ironed out during the next months.

To enable this feature, open the following link, or go to Settings -> Org setting -> Security & privacy -> Idle session timeout (Preview).

Idle session timeout (Preview)

Click on “Turn on to set the period of inactivity for users to be signed off of Office web apps”, then set the timeout period and click “Save”.

Once you are done, users will get the following prompt if they do not interact with the Office tabs for the configured period.

There is no way of removing the “Stay signed in” option for now, which lets the user keep the sessions from disconnecting.

The GA is expected by June 2022.

Outlook requires app password for connecting to Exchange Online

Even if most people use modern authentication for connecting with Exchange Online, some users still have to use app passwords to enable connections from Outlook.

For tenants created after August 2017, modern authentication is enabled by default, but some admins have it turned off.

To enable modern authentication for Exchange Online, follow these steps:

  • Let all the basic authentication protocols selected.
  • Click “Save“.

You should aim to disable all the basic authentication protocols as soon as possible.

To enable modern authentication on Outlook 2013, click on the following guide:

Enable Modern Authentication for Office 2013 on Windows devices

Scan now is greyed-out in Azure Information Protection – AIP

If you just installed the Azure Information Protection on-premises scanner and you are trying to start your first Content Scan Job, you might get that the button “Scan now” is greyed out.

Before attempting to troubleshoot, check that you selected the job below. If you did, try restarting the service “Azure Information Protection Scanner” on the SQL server and refreshing the Azure Content scan job page.

If you still cannot start the scan, try executing the following command on the SQL server, and insert the credentials of the service account:

$scanner_account_creds= Get-Credential
Start-AIPScannerDiagnostics -onbehalf $scanner_account_creds -Verbose -VerboseErrorCount 50

For further information refer to the following articles:

Troubleshooting your unified labeling on-premises scanner deployment

Start-AIPScannerDiagnostics

Enable number matching and additional context with Microsoft Authenticator – Azure AD

General Introduction

It’s been a long time since Microsoft released number matching and additional context for the Microsoft Authenticator. These features allow you to quickly improve your MFA posture, adding a new layer of security and preventing accidental approvals. This is also useful to lower the chances of being compromised by MFA fatigue attacks.
The feature consists in a map shown on your MFA prompt on your phone that indicates where the MFA request is coming from, the name of the application requesting the MFA challenge, and a box to insert the number that will be shown on screen.

Image taken from the Microsoft Docs. Link in the notes


How to enable it

To enable these features follow this link, which will guide you into Azure AD > Security > Authentication methods:

Authentication methods | Azure AD

From here, click “Microsoft Authenticator“.

Click “Yes” under “ENABLE“, then on “Configure“.

Be sure to activate “Require number matching for push notifications“, “Show application name in push and passwordless notifications” and “Show geographic location in push and passwordless notifications“, then save.

You can scope the features to a selected group of users if you want to test them out and go for a gradual rollout. This is done by selecting “Select group” and adding the group for which you want to enable the feature.


Additional notes

Check out this article if you are looking for a communication to send out to users before rolling out the features:

Here is a link to the Microsoft Documentation:

How to use number matching in multifactor authentication (MFA) notifications – Authentication methods policy

Here is a link to the CISA documentation on the topic:

Implementing Number Matching in MFA Applications | CISA

Automatically apply Sensitivity Labels to files and libraries – Microsoft Purview

There are a couple of ways to enable an automatic classification of files in SharePoint. The first one, more complete from a customization point of view, is to use a File Policy in Defender for Cloud Apps. The second one (the newer and less recommended one, to be fully released Q3/Q4 2022) is to use a Default Sensitivity Label in SharePoint Online.

If you are looking at how to enable file monitoring and file policies, follow this guide:

File Policy in Defender for Cloud Apps

To create a policy that automatically matches and labels files in the root folder and the subfolders, follow the steps below:

  • Open the MDCA portal.
  • Create a new file policy.
  • Create a broad filter. I’ve set it as “App equals SharePoint Online” for this example.
  • Under “Apply to”, specify the root folder where the policy should start to apply.
  • Apply the governance action “Apply sensitivity label”, and select your label. Check the box below if you wish MDCA to override all user-defined labels. This will override older labels set on docs in the site and new ones defined at document creation.
  • Save the policy

Suppose you would like a policy to automatically apply labels to all the files and subfolders recursively from a root folder onward in SharePoint or OneDrive. In that case, you might think you can use the “Files matching all of the following” filter. Unfortunately, this won’t work, as it will not match recursively on the files contained in the subfolders.

Default Sensitivity labels in Sharepoint Online

Once you enable SharePoint to process labels, you can configure a default label for document libraries. This will ensure that any new or newly modified files get the specified label.

The feature will not apply to documents not opened since setting the default label or if the file has a higher priority label applied. Therefore, I would recommend, for the moment, using PowerShell or MDCA (as shown above) before setting the default label.

The feature will also not work if you have “User access to content expires” set anything other than Never or if you use Double Key Encryption.

I’ve recently created a quick script to enable this feature. Check it out here:

https://azvise.com/2023/07/14/enable-default-sensitivity-labels-in-sharepoint-online/